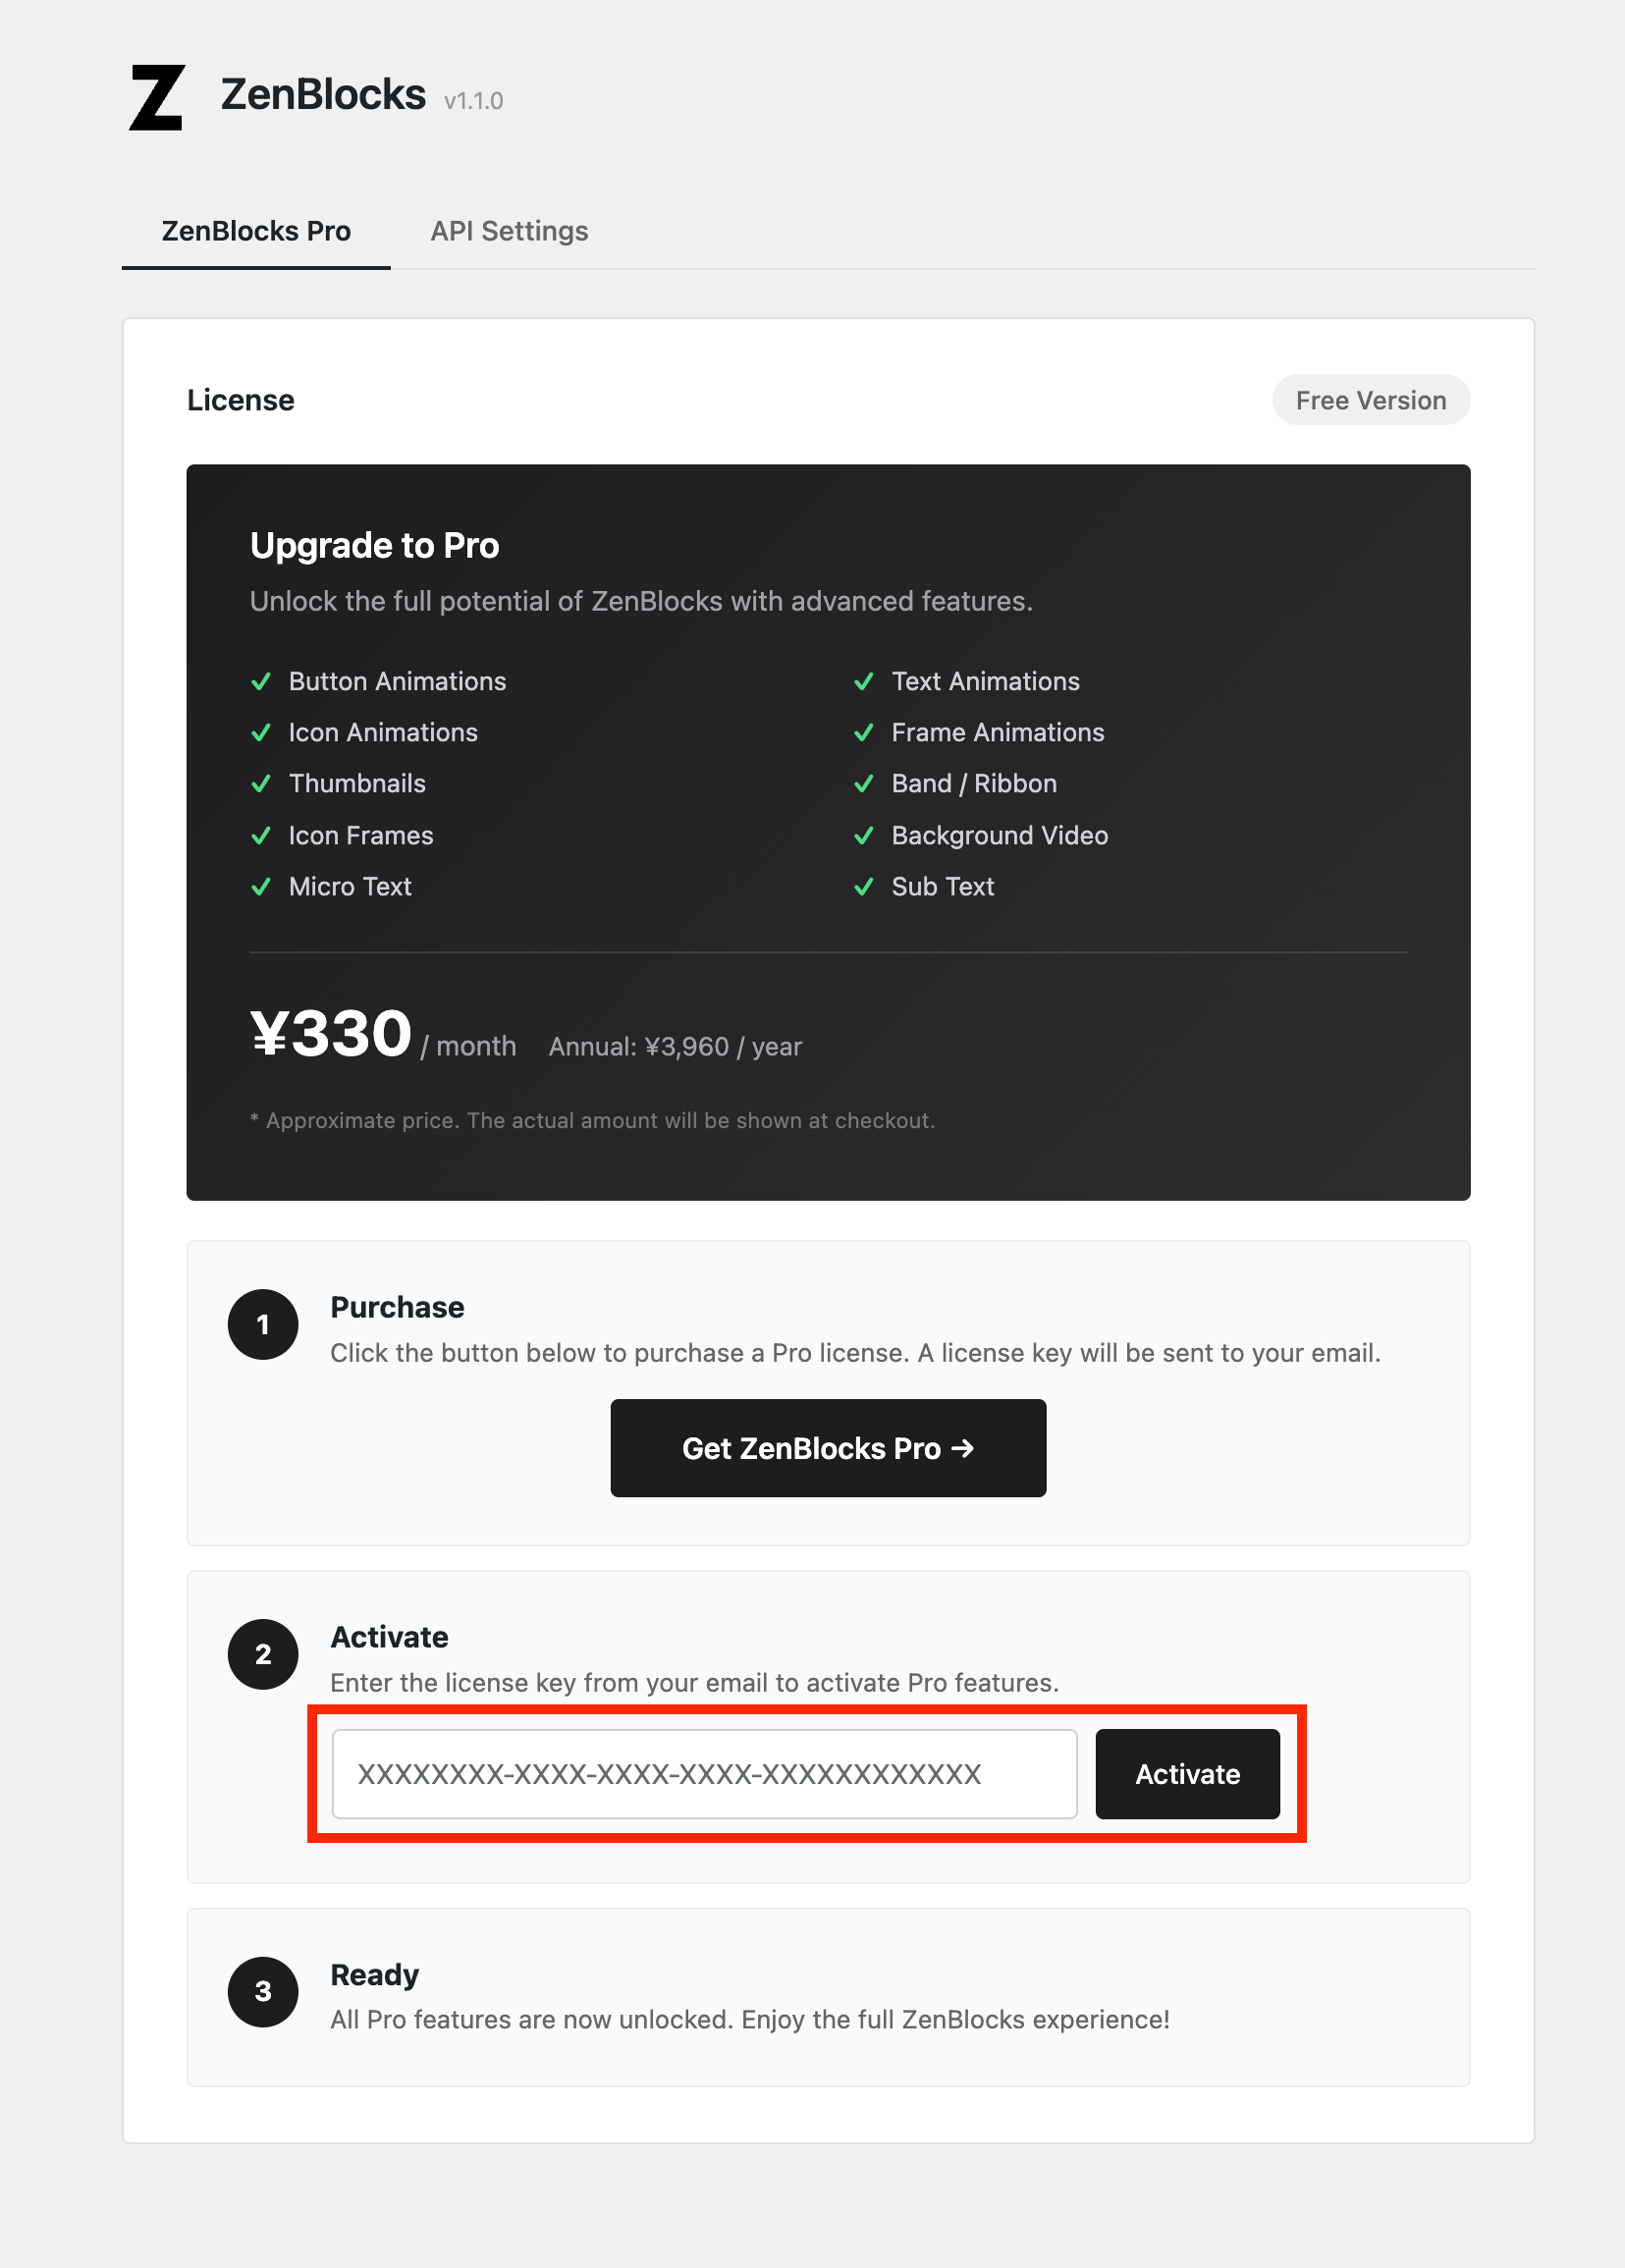
ZenBlocks paid features are managed from the Pro tab under Settings > ZenBlocks in the WordPress admin. This page covers not only the initial setup right after purchase, but also common points of confusion when renewing a license or re-setting up on a different site.
What You Can Do on This Screen
- Enter and activate your license key
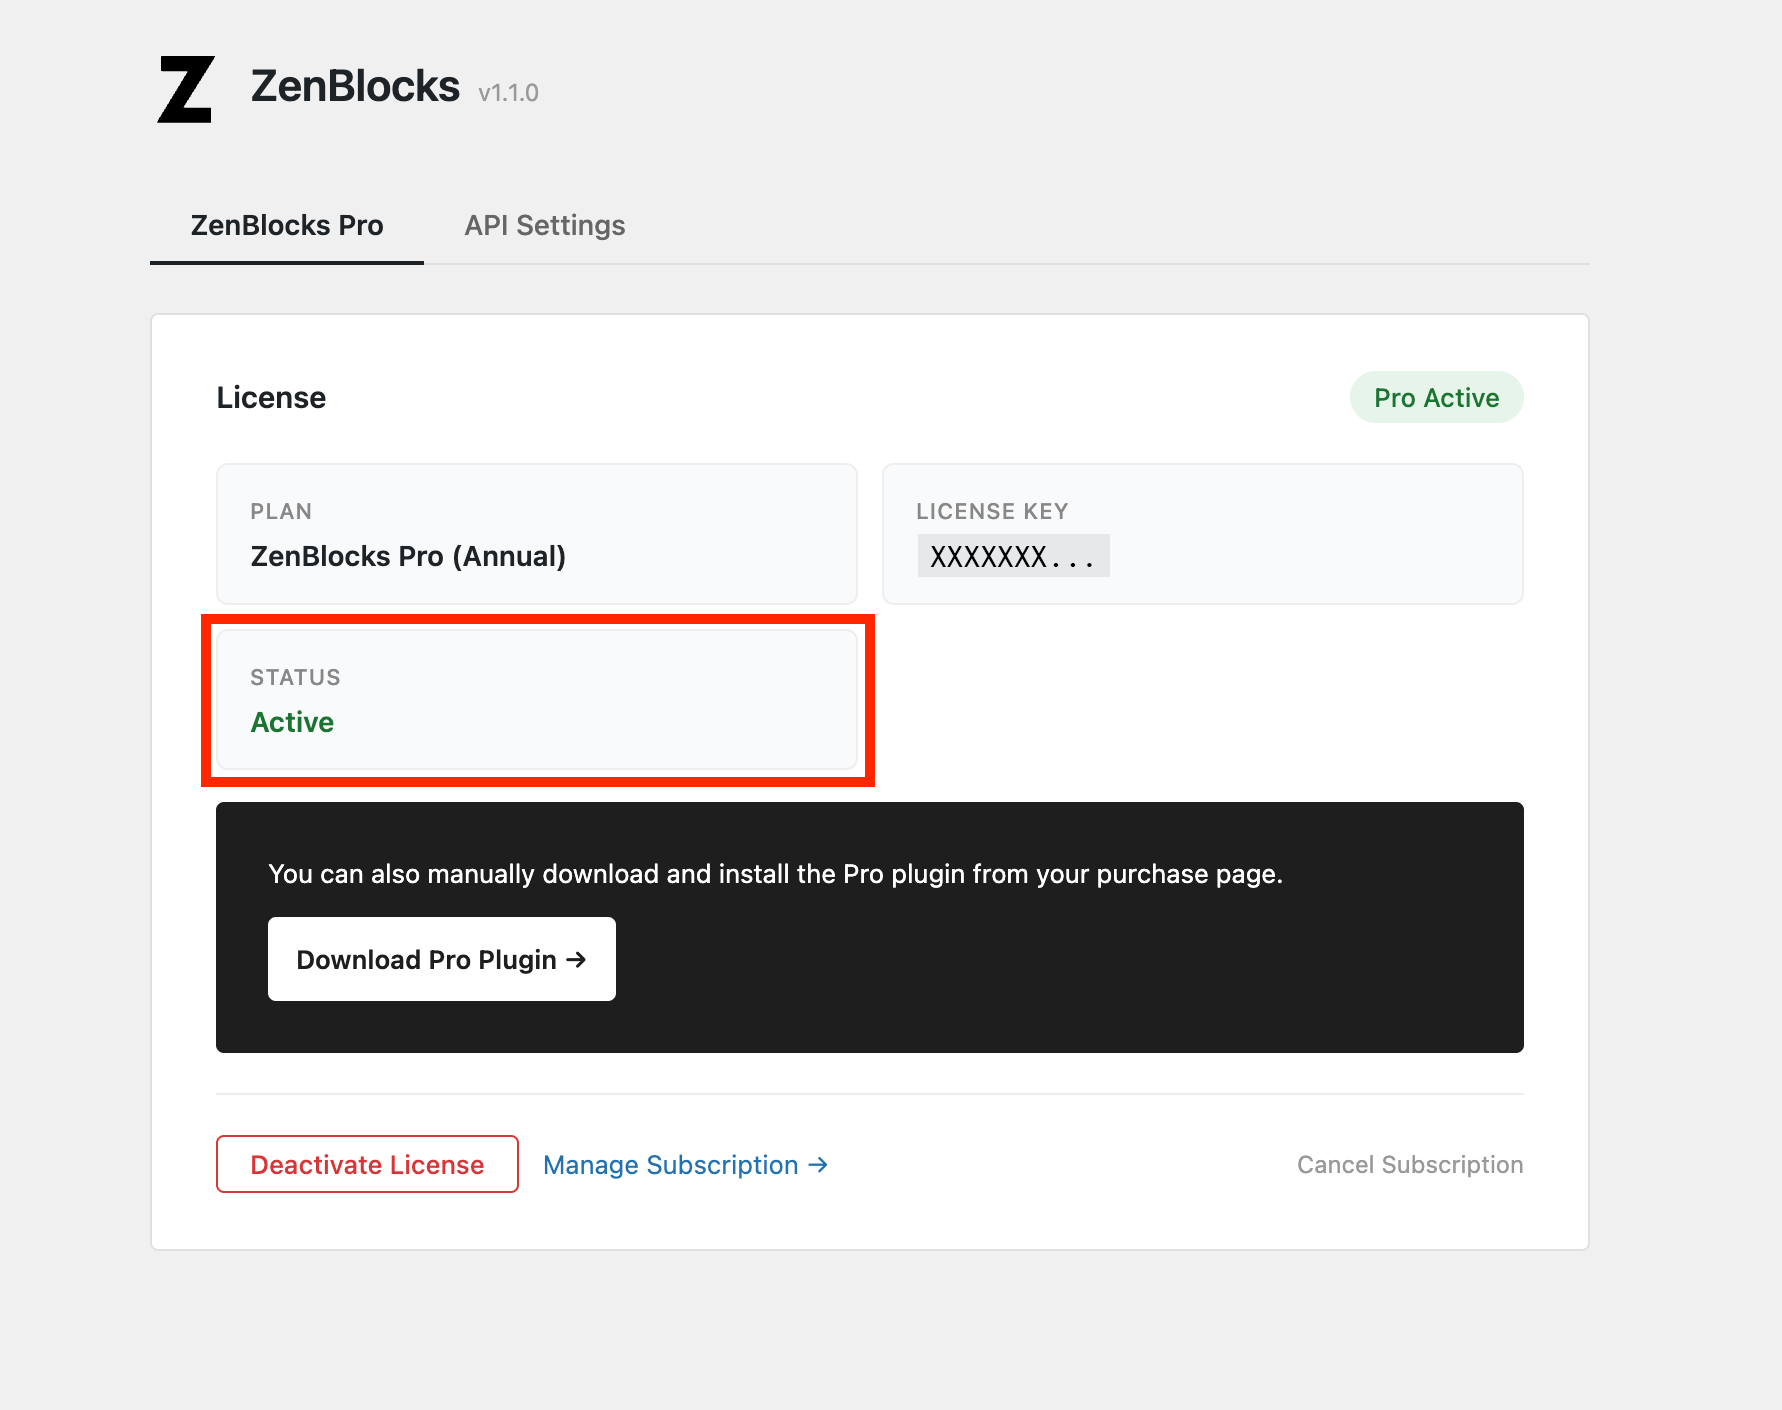
- Check your current plan, renewal date, and status
- Auto-install the Pro plugin
- Deactivate your license
- Navigate to the subscription management page on Lemon Squeezy
Setup Steps
- Open Settings > ZenBlocks
- If you haven’t purchased yet, click Get ZenBlocks Pro to make a purchase
- Enter the license key included in your purchase confirmation email
- Click Activate and confirm the status changes to Active
- If Install Pro Plugin appears, proceed with the installation
- Open the editor and verify that Pro-exclusive panels are unlocked
Verification Checklist
- Is the status showing Pro Active?
- Has the warning about a missing Pro plugin disappeared?
- Can you access Pro items such as animations and thumbnails in the block settings?
- Can you navigate to your subscription details via Manage Subscription?
Important Notes
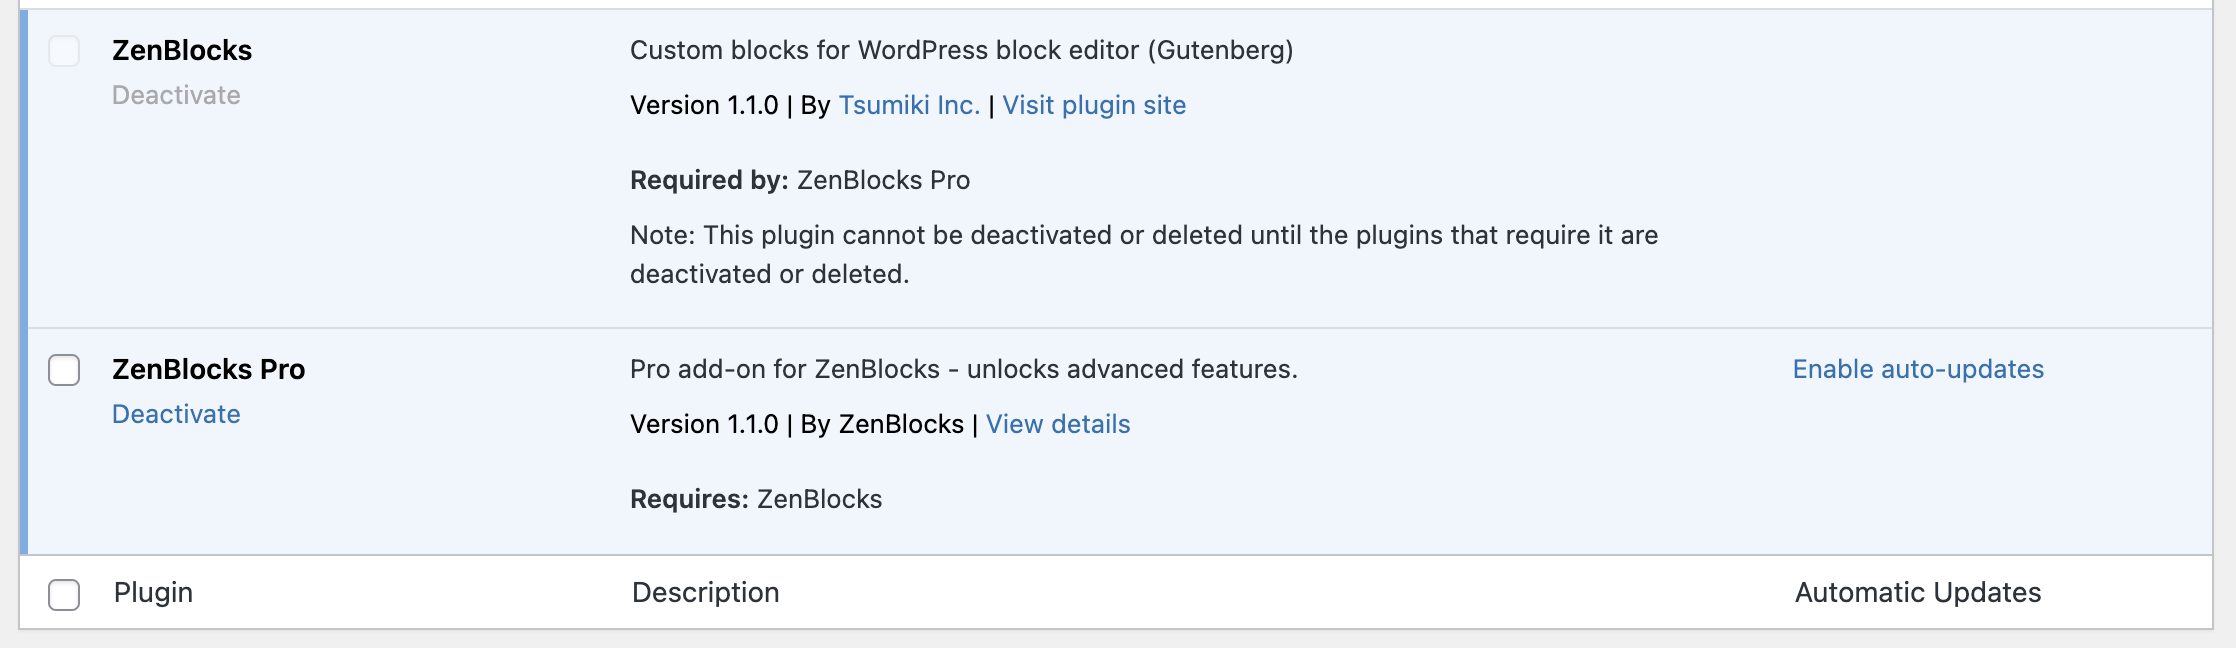
- License activation alone is not enough — you also need to install the ZenBlocks Pro plugin itself
- When moving to a different site, run Deactivate License on the current site first
- Even if you pause Pro, any saved Pro attribute values are retained
- Re-activating with the same license key lets you pick up right where you left off
Common Issues
Pro Features Not Visible Despite Active Status
- In most cases, the Pro plugin is either not installed or has been deactivated
- Check the plugin list to confirm ZenBlocks Pro is active
- If nothing changes after activation, try refreshing the browser and restarting the editor
Switching to a Different License Key
- Deactivate on the old site first, then Activate on the new site
- For subscription management or billing changes, use Manage Subscription rather than WordPress